How To Fix Windows Protected Your PC Warning on Windows 11
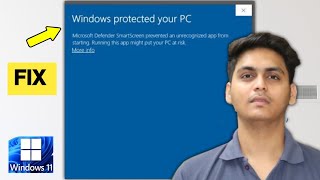
If you’ve ever seen the message “Windows protected your PC” while trying to open a program, you know how frustrating it can be. The alert is part of Microsoft Defender SmartScreen, which blocks unrecognised apps that might pose a risk. In most cases the warning is harmless, but it can prevent legitimate software from running. This guide explains how to fix Windows protected your PC safely, when to disable the feature, and how to restore protection afterward.
What Triggers the “Windows Protected Your PC” Message?
Microsoft Defender SmartScreen uses three main criteria to decide whether an app is safe:
- Reputation data – Files that have never been downloaded or signed by a trusted publisher are flagged.
- File hash analysis – The system checks the file’s cryptographic hash against Microsoft’s database of known‑good and known‑bad files.
- Behaviour monitoring – If an app tries to modify system settings or access sensitive locations, SmartScreen may intervene.
When any of these checks fail, Windows displays the “Windows protected your PC” warning. The alert is designed to protect you, but it can also appear for brand‑new utilities, open‑source tools, or older software that simply lacks a digital signature.
Common Reasons You See the Warning
Understanding why the alert appears helps you decide whether the app is safe and what steps to take.
- Unrecognised publisher – The program is not signed with a trusted certificate.
- New or rarely used software – The file has not built a reputation on Microsoft’s servers.
- Corrupted download – A damaged file may trigger the warning as a precaution.
- Potential malware – The file matches known malicious patterns.
If you are confident the software is legitimate (for example, a tool you downloaded from a reputable website), you can proceed with the fix steps below.
Step‑by‑Step Guide: How To Fix Windows Protected Your PC
Follow these instructions to bypass the warning for a specific app while keeping overall protection active.
1. Verify the Source of the File
Before making any changes, double‑check that the download came from an official site or a trusted developer. Look for HTTPS in the URL, read user reviews, and, if possible, compare the file’s hash (SHA‑256) with the value provided by the publisher.
2. Use the “More info” Option
When the warning appears, click More info. This expands the dialog and reveals a Run anyway button. Clicking this button tells Windows to allow the