Introduction to Photo Transfer on Wood
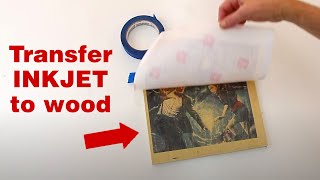
Transferring a printed photo to a piece of raw pine wood can be a unique and creative way to display your favorite memories. This technique allows you to add a personal touch to your home decor, and with the right materials and steps, you can achieve a beautiful and lasting result. In this article, we will guide you through the process of transferring a printed photo to raw pine wood, including the necessary materials, preparation, and application.
Materials Needed
To transfer a printed photo to raw pine wood, you will need the following materials:
- A printed photo, preferably on regular paper or inkjet paper
- A piece of raw pine wood, sanded to a smooth finish
- A gel medium or transfer solution, such as Mod Podge or Golden Medium
- A paintbrush or foam brush
- A sealant, such as varnish or polyurethane
- A work surface, such as a table or countertop
- A weight or clamp, to apply even pressure
Preparing the Wood Surface
Before transferring the photo, it is essential to prepare the wood surface to ensure a smooth and even application. Start by sanding the pine wood to a smooth finish, using a fine-grit sandpaper. This will help to remove any imperfections or rough spots on the wood. Next, wipe the wood surface with a damp cloth to remove any dust or debris. Allow the wood to dry completely before proceeding.
Preparing the Photo
To prepare the photo for transfer, start by trimming the edges to the desired size. Make sure the photo is free of any dust or debris, as this can affect the transfer process. If using a laser-printed photo, you may need to apply a fixative or sealant to the photo to prevent the ink from running or smudging during the transfer process.
Applying the Transfer Solution
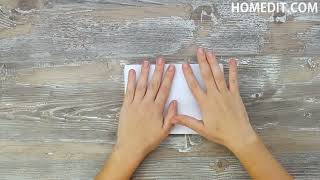
To apply the transfer solution, start by brushing a thin layer of gel medium or transfer solution onto the wood surface. Make sure to cover the entire area where the photo will be applied. Next, place the photo face down onto the wood surface, aligning it with the edges of the wood. Use a weight or clamp to apply even pressure to the photo, ensuring it is firmly in place.
Allowing the Transfer to Set
Allow the transfer to set for several hours or overnight, depending on the type of gel medium or transfer solution used. This will give the solution time to dry and bond the photo to the wood. It is essential to be patient and not rush the process, as this can affect the quality of the transfer.
Removing the Paper
Once the transfer has set, you can remove the paper from the back of the photo. Start by dampening the paper with water, and then gently peeling it away from the wood. If the paper is stubborn, you can use a gentle scrubber or a soft-bristled brush to help remove it. Be careful not to scratch the wood surface or damage the photo.
Sealing the Photo
Finally, apply a sealant to the photo to protect it from dust, moisture, and fading. Use a varnish or polyurethane, applying it according to the manufacturer's instructions. This will help to preserve the photo and ensure it remains vibrant and clear for years to come.
Tips and Variations
There are several tips and variations to keep in mind when transferring a printed photo to raw pine wood. Experimenting with different types of wood and transfer solutions can help you achieve unique and interesting effects. Additionally, you can add textures or embellishments to the wood surface before applying the photo, such as paint, stains, or metallic leaf. With practice and patience, you can create beautiful and lasting photo transfers on raw pine wood.
Conclusion
Transferring a printed photo to raw pine wood