Minecraft Shader Bright Colors: Enhancing Your Gameplay Experience
Minecraft, the beloved sandbox game, offers a vast and immersive world for players to explore and build. One of the ways to enhance this experience is by using shaders. Shaders are small programs that run on your computer's graphics card, altering the way the game's visuals are rendered. They can significantly improve the game's visual quality, making it more realistic and immersive. In this article, we'll delve into the world of Minecraft shaders, focusing on the use of bright colors.
What are Minecraft Shaders?
Minecraft shaders are a type of post-processing effect that can be applied to the game to enhance its visuals. They work by taking the raw data from the game and processing it through a series of algorithms to create a more realistic and visually appealing image. Shaders can be used to add a wide range of effects, from realistic lighting and shadows to more stylized and artistic looks.
The Importance of Bright Colors in Minecraft Shaders
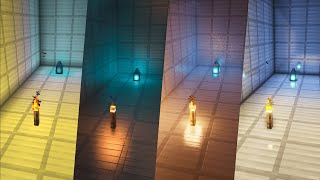
Bright colors can play a significant role in enhancing the visual appeal of Minecraft shaders. They can help to create a more vibrant and lively world, making it easier to distinguish between different types of blocks and materials. This can be particularly useful in large builds or complex redstone circuits, where it can be difficult to see the details without the help of bright colors.
Bright colors can also be used to create a more immersive and engaging gameplay experience. For example, a bright red shader might be used to create a more intense and dramatic atmosphere, while a bright blue shader might be used to create a more calming and peaceful environment. This can help to set the mood for different types of gameplay, whether it's exploring a dark and dangerous dungeon or relaxing in a peaceful village.
Popular Minecraft Shaders with Bright Colors
There are many popular Minecraft shaders that feature bright colors. Some of the most popular ones include:
- BSL (Better Shaders) Shaders: BSL shaders are a popular choice among Minecraft players, offering a wide range of effects and customization options. The BSL shaders come in a variety of styles, from realistic to more stylized and artistic looks. Many of the BSL shaders feature bright colors, helping to create a more vibrant and visually appealing world.
- SEUS Shaders: SEUS shaders are another popular choice among Minecraft players, offering a wide range of effects and customization options. The SEUS shaders are known for their realistic lighting and shadows, as well as their use of bright colors to create a more vibrant and visually appealing world.
- Complementary Shaders: Complementary shaders are a popular choice among Minecraft players, offering a wide range of effects and customization options. The Complementary shaders are known for their use of bright colors, helping to create a more vibrant and visually appealing world.
How to Install and Use Minecraft Shaders
Installing and using Minecraft shaders can be a bit of a learning curve, but it's definitely worth the effort. Here's a quick guide to get you started:
- Install the OptiFine mod: OptiFine is a popular mod for Minecraft that is required to use most shaders. You can download it from the official OptiFine website.
- Download the shader pack: Once you've installed OptiFine, you can download the shader pack of your choice. There are many shader packs available, so take your time to find one that you like.
- Install the shader pack: To install the shader pack, simply place the .zip file in the "shaderpacks" folder in your Minecraft directory. The location of this folder may vary depending on your operating system.
- Enable the shader pack: To enable the shader pack, open Minecraft and go to the "Options" menu. From there, select "Video Settings" and then "Shaders." You should see a list of all the shader packs that you've installed. Select the one that you want to use and click "Done."
- Adjust the shader settings: Once you've enabled the shader pack, you can adjust the settings to your liking. Most shader packs come with a variety of settings that you can tweak to get the look that you want.
Conclusion
Minecraft shaders with bright colors can significantly enhance your gameplay experience, making the game more visually appealing and immersive. Whether you're exploring a vast and complex world or building a large and intricate structure, the right shader can help you see the details and appreciate the beauty of the game. So why not give it a try and see for yourself the difference that shaders can make?