Designing the Perfect Minecraft Underground Base
Building an underground base in Minecraft offers a blend of security, creativity, and comfort. Whether you are a veteran player looking for a hidden fortress or a newcomer seeking a safe haven, this guide covers the essential steps to create a functional and aesthetically pleasing base beneath the surface.
Why Choose an Underground Location?
Underground bases provide several natural advantages:
- Protection from mobs – The stone ceiling blocks most hostile mobs from spawning above you.
- Stealth – A hidden entrance keeps your base out of sight from other players in multiplayer worlds.
- Climate control – The temperature remains constant, making it ideal for farms and storage.
Planning Your Layout
Start with a clear floor plan. A common approach is to divide the base into distinct zones:
- Entrance & Security – A concealed ladder or water elevator leading to a pressure‑plate door.
- Living Quarters – Bedrooms, a kitchen, and a cozy lounge area.
- Resource Rooms – Storage chests, crafting tables, and enchantment stations.
- Utility Section – Redstone circuitry, farms, and a mob grinder.
In this tutorial I will show you how to build an efficient layout that maximizes space while keeping the design simple enough to expand later.
Step‑by‑Step Construction Guide
1. Selecting the SiteChoose a location with easy access to resources. Mountain slopes, cliffs, or dense forests work well because they provide natural cover. Use the /seed command to find a spot with a nearby cave system – this can reduce excavation time.
2. Digging the Main ChamberBegin by digging a 20×20 block area at a depth of at least 12 blocks below ground level. This size offers ample room for expansion. Remember to keep the ceiling at least three blocks high to avoid suffocation damage when you add staircases later.
3. Building the EntranceA hidden entrance adds an extra layer of security. One popular method is a waterfall trapdoor:
- Place a water source block at the top of a 2‑block high shaft.
- Cover the shaft with a piston that opens only when a hidden lever is activated.
- Cover the entrance with a layer of leaves or a painting to blend with the environment.
In this video I Sp

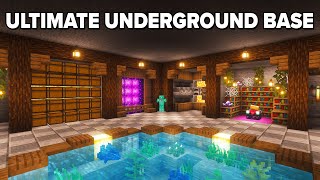


![Minecraft Underground Base Tutorial [How to Build]](https://i.ytimg.com/vi/By6safCNT6w/mqdefault.jpg)


